Showing posts with label DIY. Show all posts

brown bag valentine


 I hope you have a fantastic weekend everyone! Maybe you're pulling out the craft box to make valentines or snuggling up next to a fire with a mug of tea (for those of you snowed in on the east coast) or going for a horse-drawn sleigh ride.

Wait ... a what? 

My family is actually going for a sleigh ride tonight. Instead of giving gifts at Christmas this year, we bought Groupons for a hot-cocoa and dinner sleigh ride for 10 in Breckenridge. After a loop in the woods, we'll have a steak and trout cowboy dinner and berry cobbler. But lest you envision a romantic evening with softly falling snow flakes and twinkling stars, I should mention that it is 15° in Breckenridge with blowing snow, 45 mph gusts and a -4° windshield. So we like a little adventure too! I'm especially liking the "wrapped in blankets" part of this ride.

While I'm looking for my long-johns, here is a little valentines inspiration from the archives. I especially like this packaging because you can fill the brown bags with anything you like. These ones were filled with Girl Scout Cookies, but use your sweet tooth imagination!


p.s. I don't actually own long-johns, but I've always wanted to!

photos by sarah fritzler


tis the season ...

Hello! I'm wearing my red and green this Monday morning and I thought I aught to share a little Christmas spirit on the blog today. I've been decking the Nest (a.k.a my condo) out with pine branches, lights and white pumpkins, but I need to snap a few pictures to share. Until then, here are a few festive ideas for you from last year. I know, I know, butcher paper and gold spray paint were so last year ... but these are from last year and, besides,  I'm not really over it yet. 

(click the titles to see more)

Butcher Paper Gift Wrap


DIY Stir-in Hot Cocoa


Gold Woodland Animals

Holiday Granola 
photos by sarah fritzler

diy: recipe box journal calendar


In January I saw this diy calendar journal and knew it would be the perfect gift for a friend. Of course, I bought extra of everything and made one for myself as well. I can't wait for next year when I'll add to each card and be reminded of what I did one year before. It's already fun to look back at January (I'm trying to limit my peeking!). I'm not a journal-keeper so this is an easy way for me to have some sort of yearly memento. Just think how fun it will be to look back in 5 or 10 years!

I ended up making 3 calendars and stamped my way through a good portion of Anne of Green Gables and Sense & Sensibility ... yep, I stamped 365 dates on 1,095 cards. Whew! But, really, it's not hard and easily done in front of a good movie. I used brown paper for month dividers and found a vintage recipe box on etsy (just so happens to be the same one ... I felt like I was cheating ... but I was pleased).

So far it's been easy to keep up with, but we'll see if I say the same thing one year from now!

Supplies:
- vintage recipe box
- note cards (without lines)
- contrasting paper for dividers 
- custom date stamp

 images by sarah fritzler

happy valentines day!


Happy Valentines Day! My single sisters and I are planning an extravagant evening of Panera Bread take-out, sweatpants, toffee and sea salt chocolate bars and a chick-flick at home. I can't wait.

Above are a few photos I snapped this morning of my valentines. It's been a busy week so I chose something simple and that everyone loves — girl scout cookies! I hope you have a wonderful day!


x o x o,
Sarah

[supplies: mini brown bag, mini doily, fabric tape, date stamp, gold paperclip, cookies!]

photos by sarah fritzler

diy: stir-in hot cocoa


Hello!
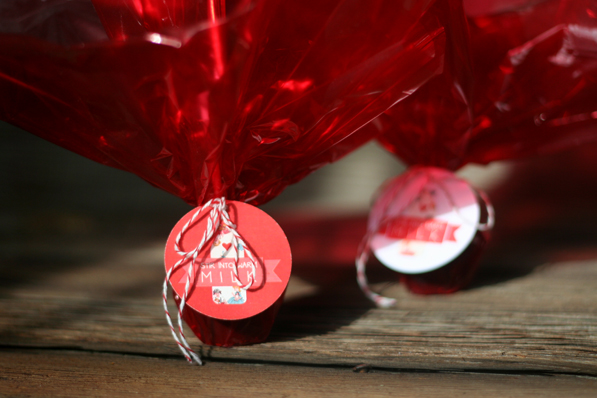
Here is another easy do-it yourself valentines idea. And this one can be paired with the literary quote mug valentines. You didn't plan on handing them an empty mug, did you? ;)

I'm going to call this Grandma's Favorite Stir-in Hot Cocoa because my grandma loves it!

Supplies you will need:
- Melting chocolate for candy-making (I used Wilton, but I've since found out you can get Ghirardelli's — there's a no-brainer!)
- Candy-canes or peppermints
- Red cellophane wrapper, string, valentines tag

All of these supplies may be found at your local craft store.

Do it yourself:
1. Use bag instructions to melt chocolate into candy molds.
2.  Stick lollipop sticks into each mold.
3. Put candy-canes or peppermints in zip-lock bag and crush into small pieces. Sprinkle on top.
4. Let chocolate set according to bag instructions
5. Remove from molds and wrap in red cellophane. Finish with a bow and valentines tag.


Of course, you can customize these as much as you like. A few ideas: heart shaped molds, white and dark chocolate swirl, mini-marshmallows on top, caramel swirl ... enjoy!


 pictures by sarah fritzler


from the archives: valentines


Just a few ideas from my Valentines archives!

DIY Literary Quote Mugs (full post)


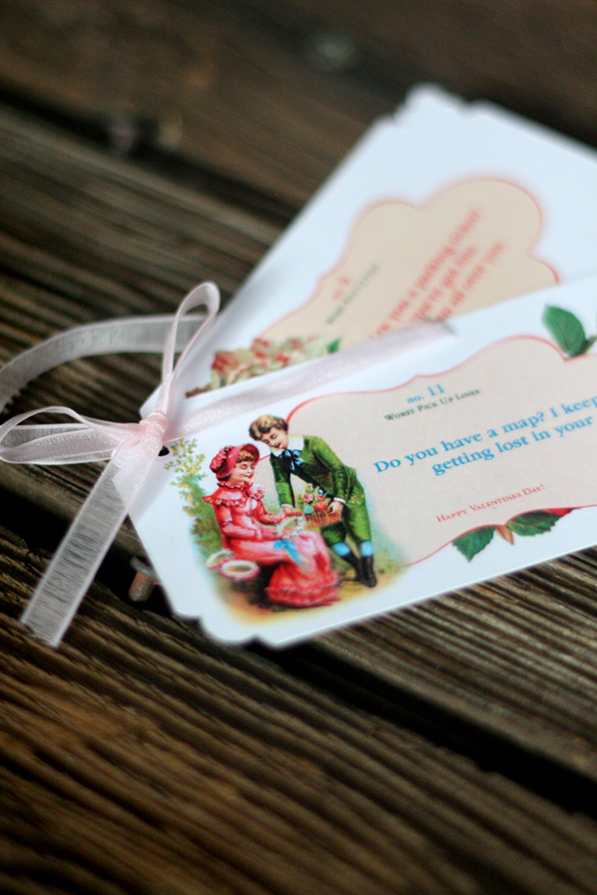
Worst Pick-up Line Tags (full post)


Handmade Valentines (full post)

photos by sarah fritzler

diy: valentines chocolate bar label


This may be my favorite DIY yet.

Valentines Day tends to overdose my sweet tooth. But chocolate bars? I never feel like I have too many of them laying around! Here is a chocolate bar label valentine idea for you. You can customize it to your heart's delight! I simply took the label off of a Symphony Almond Toffee Chocolate Bar (so good!) and used it to make a template. I created a vintage flower design on the front and a love quote on the back (I personalized these for each recipient). I also made tags with the "worst pick-up lines" to add a little humor.

The options are endless! Make them your own by personalizing them for your loved one on their favorite candy bar. These would also be great children's valentines with crayon drawings wrapped around chocolate bars. Have fun!


p.s. The little secret behind this DIY is that I made it two years ago. My mom thought it was too pretty to eat (silliness!) so I found this one fully intact and snapped some pictures to share with you.

pictures by sarah fritzler 

gold sticks


Sticks were my favorite object to receive the Midas touch this week. I used these sticks to suspend the ornaments I spray painted, which gave me a little idea. So my mom handed me a bundle and I got to spraying. They were so beautiful in the sunlight!


What do you do with gold sticks? Our garland donated a branch to tie them up and adorn my bedroom door with a little bit of cheer.


Once again ... these are Henry approved.


photos by sarah fritzler

gold christmas wreath


Gold seems to be the thing this Christmas and I'm so glad because gold IS the thing in my book! Over the weekend my mom and I finally got our garland put up over our front door. Whew. Now we can join the "good neighbors club" again. While we were at it I decided to use the can of gold spray paint I picked up last week to makeover the wreath on our front door.

Gold spray paint makes everything better, shinier, and better again! I'm wishing I had some little plastic woodland creatures to add to this wreath.


Even Henry approves.


images by sarah fritzler

diy: no-sew triangle banner


Today is my dear friend, Courtney's, birthday. I've been thinking about her and her little muffin who is soon to enter the world! I call Courtney "Martha" because she's the perfect little home-maker slash successful, driven, educated woman. Let me tell you, she is impressive. But one thing we both lack on our resumes is sewing. Our moms taught us, but we seem to have left off somewhere a long time ago. This is why we were both a little daunted by the idea of making a triangle flag banner for the baby's room.

But no! We conquered that little flag without a single needle. Here's how:

DIY No-Sew Triangle Banner
Supplies:
- A variety of cotton fabric designs (we chose from the quilt scraps at Joann Fabrics)
- Basting tape
- Double sided fusible webbing
- Iron, ironing board, spray bottle, scissors, paper & pencil

Instructions:
1. Pre-wash and iron fabric.
2. Draw triangles on fabric with a pencil. Only draw one triangle per flag. Do not cut.
3. Use iron-on instructions to adhere fusible webbing to back of first flag.
4. Next, fuse this first flag to another piece of the same fabric to create the back side of the flag.
5. Cut triangle out along pencil lines.
6. Repeat steps 2-5 to create all of your flags.
7. Open basting tape and adhere fusible webbing inside. Do not close
8. Place the top of your flags inside the basting tape crease and fold basting tape over. Iron to secure.

That's it! Not a single bit of sewing needed. I didn't take pictures of the steps so I hope these instructions were clear enough. It is fairly intuitive once you have tried the fusible fabric on a test piece.


Happy birthday to my dear friend (and soon to be mommy), Courtney!


photos by sarah fritzler
Related Posts Plugin for WordPress, Blogger...